Table of Contents
Introduction to Yeast Doughnuts
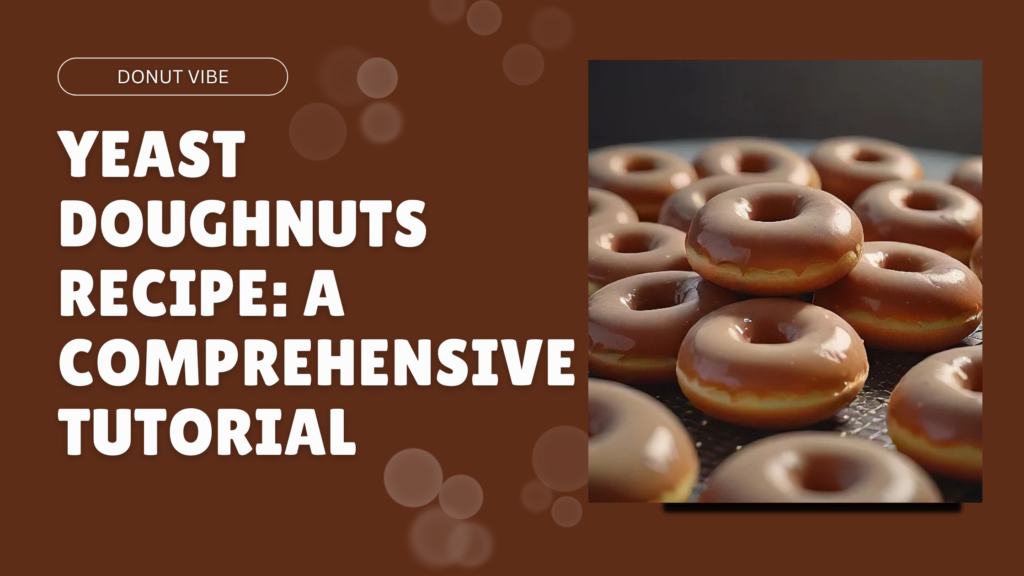
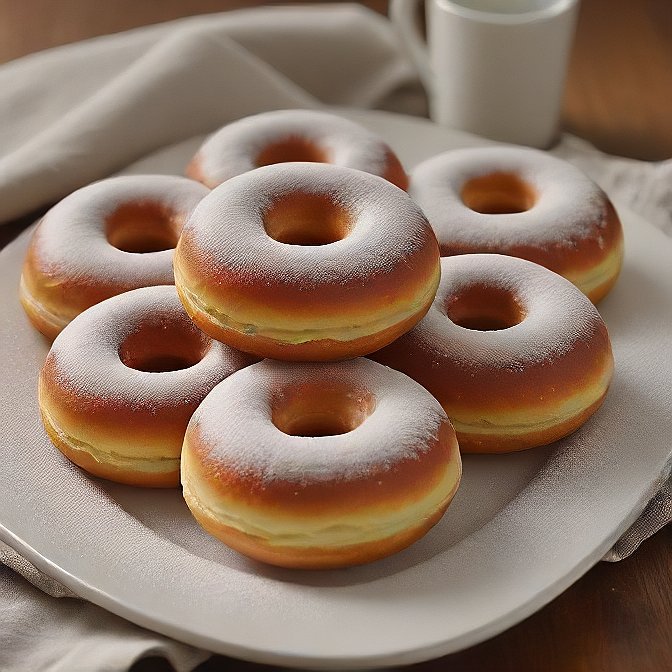
Yeast doughnuts are small, they are delectable, and when you take a bite, the doughnuts are fluffy with a chewy texture, which is different from cake doughnuts. These scrumptious are as crunchy outside as they are light inside, and they are served best when you can put sauces, spreads, jam, cream, or even powdered sugar on them. Cake doughnuts, on the other hand, do not use baking powder or soda for leavening agents but yeast, which is used in yeast doughnuts, and this gives yeast doughnuts their texture and flavor.

To prepare yeast doughnuts from scratch, the process may look very challenging, but that’s not the case at all; bear your ingredients, exert little time and effort, and follow standard procedures, and you will be amazed at what you will produce in your kitchen. This complete lesson will take you from start to finish, offer pointers for achieving the perfect doughnut dough, and ideas for how to decorate your treats in innovative, cool ways.
The Importance of Ingredients
- Flour: The yeast doughnuts require all-purpose flour as the right amount of proteins and gluten are present in this flour. The formation of gluten is necessary for the formation of a dough network that will hold the air which results in a fluffy doughnut. To further have a very soft doughnut, you have the option to replace a portion of the flour with cake flour.
- Yeast: Active dry yeast or instant yeast is the most commonly used yeast in yeast doughnuts. Yeast acts on the sugars to make a dough aerobic, resulting in the production of carbon dioxide hence causing the dough to rise. Be certain that your yeast is active and has been prepared correctly and that your yeast is fresh.
- Milk: Liquid, such as warm milk, is used in the preparation of this dough to activate the yeast and make the dough moist. It also brings extra depth and richness and improves the taste of the dish from the point of view of a cook.
- Eggs: Eggs make the dough more enriched making the cakes tender and have a more superior texture. It also plays a role in the development of the structure of the dough.
- Butter: The main purpose of butter is to add some taste to the dough and make the dough rich and creamy. It also assists in making the doughnuts tender after frying since the sugar enhances its softness somehow.
- Sugar: Sugar not only tastes the dough then is the yeast food during the process of fermentation or rising. It is said that it plays a part in the caramelization that takes residence after the doughnuts are fried to bounce them a brown color.
- Salt: A pinch of salt decreases the sweetness of the doughnuts and types their flavors riche
- Frying: Vegetal or canola oil is suitable for sweltering doughnuts as they are intermediate flavored oils that allow the doughnuts to fry calmly and do not produce smoke easily as their smoke point is beautiful high.
Step-by-step Instructions for Making Yeast Doughnuts
Ingredients:
- 3 ½ cups all-purpose flour (plus extra for dusting)
- 1 cup warm milk (110°F/43°C)
- ¼ cup granulated sugar
- 2 large eggs
- 6 tablespoons unsalted butter, softened
- 1 teaspoon salt
- 1 teaspoon vanilla extract (optional)
- Oil for frying
- Powdered sugar, granulated sugar, or glaze for topping
Instructions:
Activate the Yeast
To the warm milk add one tablespoon of sugar in a small bowl. Pour yeast on it and let it work for approximately 5- 10 minutes until the mixture turns slightly frothy. This is a sign that the yeast is active and willing to do its work.
Make the Dough
In a large bowl or the bowl you’ve been using in your stand mixer, add the flour, the rest of the sugar, and salt. Combine this yeast mixture with the eggs, softened butter, and vanilla essence. Stir until the components begin to amalgamate to form a sticky masse.
Knead the Dough
If you manufacture the dough using a stand mixer through the dough hook attachments then mix the dough on medium speed for about 6-8 minutes or until the dough converts tacky, smooth, shiny, and elastic in texture. If reflexology is done manually, then assign the dough to an external sprinkled with flour and knead for 8 to 10 minutes.
First Rise
Knead the dough and put it in a greased bowl, keep it covered with wet cloth or plastic, and make it rise at a warm and dry place for 1 to 1. 5 hours or even when it has risen to double its original size.
Shape the Doughnuts
When the dough has risen it is necessary to punch it down in order to get rid of the air that is trapped inside. Knead it and pat it into a smooth round disc on a floury surface, then roll it to about ½ inch thick. You may use your doughnut cutter or if you don’t have, two round cookie cutters; one big and the other small for the center. Put the cut doughnuts on a parchment-lined baking sheet and allow them to rise for approximately half an hour to forty-five minutes with a cloth over them.
Add Toppings
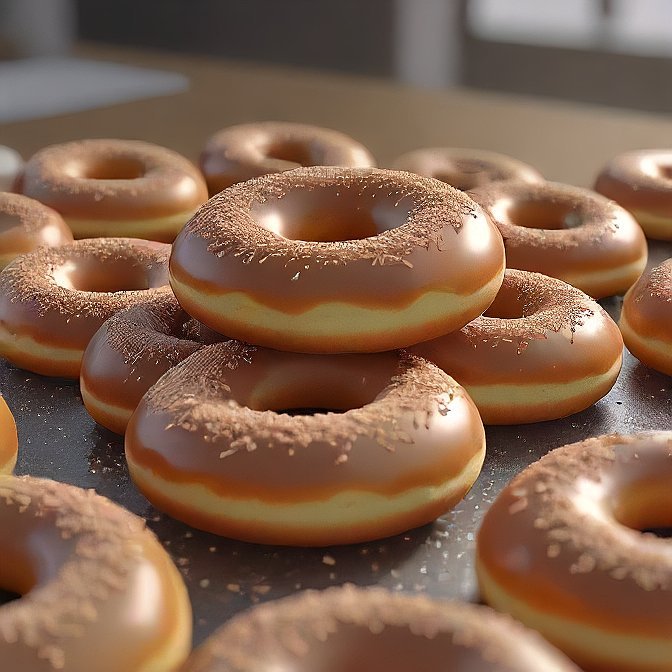
As soon as the doughnuts are done, dust them in powdered or granulated sugar. Or, you can bathe them in a glaze or you can always paint them with chocolate.
Serve and Enjoy
Have the doughnuts fresh as that is the most appropriate time to consume them, some twenty-four hours after preparation. If you are not eating all at once store in an air-tight container at room temperature for up to two days.
Check Out: How to Make Perfect Glazed Yeast Doughnuts: 3 Step Guide.
Tips and Tricks for Perfecting Your Doughnuts
- Check Your Oil Temperature: Concluded the use of a thermometer, variety sure that the oil’s temperature is maintained at the right level (350°F/ 175°C). Also, for heat, the doughnuts will appear charred on the surface but yet raw in the middle. In the instance of doughnuts, high temperature is unnecessary; subsequently, they will signify when the doughnuts are motionless hot and take up too much oil.
- Don’t Overwork the Dough: Next time, be careful while handling the dough because it will diminish the amount of air incorporated into the dough. Excess mixing can also be a cause, for instance, making the doughnuts tough.
- Proof the Dough Twice: Because the dough needs to rise twice, the doughnuts will be fluffy, and each doughnut will taste the same. The second rise occurs after the doughnuts have been formed so that they have adequate time to rise and to be flavored.
Creative Variations and Toppings
- Glazed Donuts: Coat the still-warm doughnuts in a powdered sugar glaze made of powdered sugar, milk, and vanilla. In addition, you can prepare chocolate or maple glaze as per your interest in flavor.
- Filled Donuts: Don’t make the hole in the doughnuts while preparing and stuff them with pastry cream, jam, or Nutella once you are done frying.
- Cinnamon Sugar Donuts: Prepare the doughnuts, leaving the warm doughnuts to be rolled on a mixture of cinnamon and sugar.
- Fruity Donuts: Beat orange/lemon juice to make the dough fruity, or mix a drop of fruit essence into the dough. Indeed, you may also enhance the doughnuts with a glaze that has fruit added to it.
Common Mistakes to Avoid
- Frying at the Wrong Temperature: Stubby heat, on the other hand, results in doughnuts that are rich in oils, while high heat results in doughnuts that are cooked separately but raw on the secret.
- Not Kneading Enough: A bomb to knead the mixture to the required standard will lead to the production of a doughnut with a heavy texture. It is important to have the dough well mixed and to achieve a smooth, homogenous mass that is like an elastic membrane.
- Skipping the Second Rise: What will happen when you eliminate the second proof is that you end up with doughnuts that will not swell as much when frying. When shaping the doughnuts, always ensure that the doughnuts receive ample time to rise.
- Using Cold Ingredients: Cool temperature from cold milk or butter will inhibit the activity of yeast; hence, the dough does not rise. Ensure that all the ingredients used are at room temperature so that you do not have to worry about hot potatoes in cold water.
- Overcrowding the Fryer: This prevents frying too many doughnuts simultaneously since this will reduce the heat intensity and end up with greasy doughnuts that are cooked unevenly. To fry, it is better to do it in small portions at the same time so that they are crispy when consumed.
Conclusion: Enjoy Your Homemade Yeast Doughnuts!
The process of making yeast doughnuts from scratch is rather involving but satisfying because it enables you to make fresh doughnuts for consumption anytime. This detailed guide will make you adept enough to prepare these doughnuts that are fluffy, crispy, and literally on par with the ones baked in shops. From glazing and fillings to selecting colors for your doughnuts, it’s impossible to go wrong with having delicious, yummy, homemade yeasted doughnuts with your family and friends. Income your time, do not strain over measurements, drama with the tastes, and spoil the fruits of your work.
FAQ’s
Could I make yeast doughnuts without a stand mixer?
It is also likely to knead it with your hands, but this procedure will take some more time and vigor. Mix the elements for about 8-10 minutes until the dough is even and elastic.